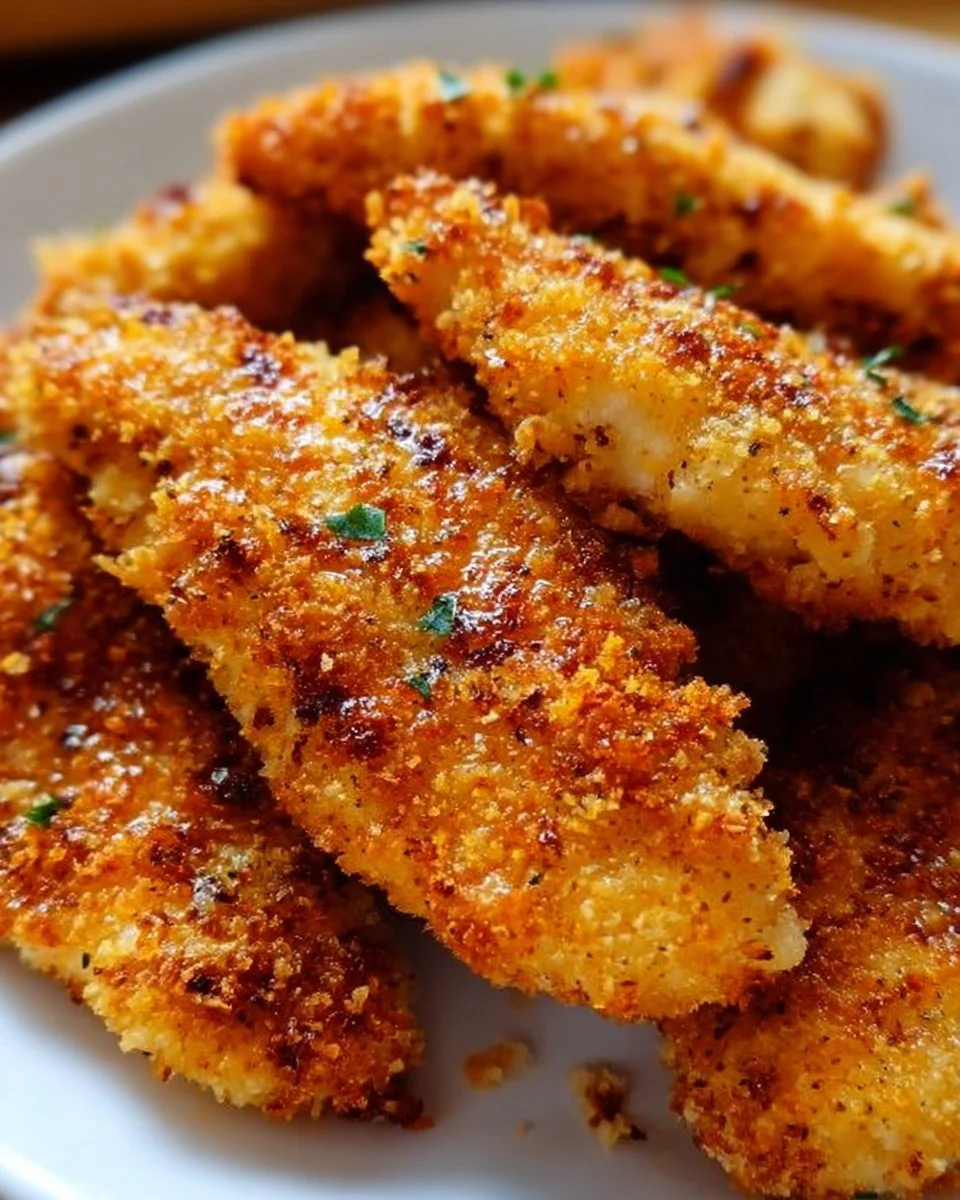
Homemade Baked Chicken Tenders
When it comes to comforting and delicious meals, homemade baked chicken tenders are a family favorite that never disappoints. There’s something universally appealing about tender, crispy chicken strips that makes them perfect for both casual weeknight dinners and fun gatherings. You might remember the childhood joy of biting into a perfectly cooked chicken tender, which is precisely the kind of nostalgia packed into this recipe. The best part? Making them from scratch ensures they’re not only healthier but also customizable to your taste!
Why you’ll love this dish
Homemade baked chicken tenders provide a world of benefits that make them irresistible. They’re quick to prepare, coming together in under 30 minutes, making them ideal for a busy weeknight. Plus, they’re budget-friendly, utilizing simple pantry staples without compromising on flavor. Kids adore them, and even the pickiest eaters won’t turn down a crispy chicken tender, especially when paired with their favorite dipping sauces. Whether you’re hosting a game day or looking for a lovely family dinner, these tenders are the perfect fit.
“Delicious! My kids couldn’t get enough and we loved how easy they were to make. They even beat the frozen store-bought ones!" – Happy Home Cook
The cooking process explained
Creating your own chicken tenders at home is straightforward and fun! Start by gathering your ingredients and setting up your dredging station—this will streamline the process and keep the mess to a minimum. You’ll coat the chicken in flour for a kick of flavor, dip it in egg for moisture, and finally bask it in the seasoned breadcrumb mixture for that golden crunch. With just a 15-20 minute bake in the oven, you’ll have crispy, juicy tenders ready to devour!
Ingredients
To whip up a batch of these tasty tenders, gather the following items:
- 1 pound chicken breasts, cut into strips
- 1 cup breadcrumbs
- 1/2 cup flour
- 2 eggs
- 1 teaspoon garlic powder
- 1 teaspoon onion powder
- Salt and pepper to taste
- Cooking spray or olive oil for baking
You can easily swap out breadcrumbs for panko for extra crunch or use gluten-free flour to accommodate dietary needs.
Directions to follow

- Preheat your oven to 400°F (200°C).
- Set up a dredging station: in one bowl, place flour; in another, beat the eggs; in a third, combine breadcrumbs with garlic powder, onion powder, salt, and pepper.
- Take each chicken strip and dip it into the flour, shaking off the excess. Next, dunk it in the egg, and finally coat with the breadcrumb mixture.
- Arrange the coated strips on a baking sheet lined with parchment paper and spray or drizzle with olive oil.
- Bake for 15-20 minutes, or until the chicken is cooked through and the coating is golden brown.
- Serve hot, and enjoy these delightful bites!
Best ways to enjoy it
These chicken tenders are versatile! Serve them straight from the oven with a side of dipping sauces like honey mustard, barbecue, or ranch for a classic touch. Pair them with crispy fries for a hearty meal or a fresh salad for a lighter option. Lay them over a bed of rice or pasta tossed with veggies for a complete dinner that’s sure to impress.
How to store & freeze
If you happen to have leftovers (which is rare!), they can be stored in an airtight container in the refrigerator for up to three days. Reheat them in the oven at 350°F (175°C) for about 10 minutes to regain their crispy texture. For longer storage, you can freeze the chicken tenders for up to three months. Just be sure to let them cool completely before sealing them in a freezer-safe bag to protect against freezer burn.
Helpful cooking tips
- Ensure your chicken strips are of even thickness for uniform cooking.
- Don’t overcrowd your baking sheet, as this can lead to steaming rather than crisping.
- Experiment with spices in your breadcrumb mixture for unique flavors; consider adding paprika for smokiness or Italian seasoning for a herby kick.
Creative twists
Feel free to play around with different flavors! Try using different herbs and spices for the breadcrumbs, such as Italian herbs or a dash of cayenne for some heat. You can also switch up the proteins; these instructions work just as well for shrimp or tofu strips. For those looking to reduce carbs, consider using crushed nuts or pork rinds as a breading alternative!
Common questions
How long does it take to prepare these chicken tenders?
From start to finish, you can expect to spend about 30 minutes preparing and cooking these chicken tenders.
What can I use instead of breadcrumbs?
You can substitute panko breadcrumbs for a crunchier coating or use crushed cornflakes or nuts as alternative breading options.
How should I store leftover chicken tenders?
Keep them in an airtight container in the refrigerator for up to three days. For longer storage, freeze them for up to three months.
Are these chicken tenders gluten-free?
Yes! Simply use gluten-free flour and gluten-free breadcrumbs to ensure they fit into your dietary needs.
Give these homemade baked chicken tenders a try, and watch as they disappear from the plate in record time. Enjoy the satisfaction of creating something so simple yet absolutely delightful!
PrintHomemade Baked Chicken Tenders

Delicious, crispy chicken strips that are healthier and customizable to your taste, perfect for family dinners or gatherings.
- Prep Time: 10 minutes
- Cook Time: 20 minutes
- Total Time: 30 minutes
- Yield: 4 servings
- Category: Main Course
- Method: Baking
- Cuisine: American
- Diet: Gluten-Free (with substitutions)
Ingredients
- 1 pound chicken breasts, cut into strips
- 1 cup breadcrumbs
- 1/2 cup flour
- 2 eggs
- 1 teaspoon garlic powder
- 1 teaspoon onion powder
- Salt and pepper to taste
- Cooking spray or olive oil for baking
Instructions
- Preheat your oven to 400°F (200°C).
- Set up a dredging station: in one bowl, place flour; in another, beat the eggs; in a third, combine breadcrumbs with garlic powder, onion powder, salt, and pepper.
- Take each chicken strip and dip it into the flour, shaking off the excess. Next, dunk it in the egg, and finally coat with the breadcrumb mixture.
- Arrange the coated strips on a baking sheet lined with parchment paper and spray or drizzle with olive oil.
- Bake for 15-20 minutes, or until the chicken is cooked through and the coating is golden brown.
- Serve hot, and enjoy these delightful bites!
Notes
Ensure chicken strips are of even thickness for uniform cooking. Don’t overcrowd the baking sheet to prevent steaming.