Homemade No Bake Granola Bars
Granola bars are a delightful treat that perfectly bridges the gap between healthy snacking and indulgence. As someone who has often juggled busy schedules, I’ve come to appreciate the joy of having nutrient-packed snacks on hand. This homemade version is not only quick to make but is also customizable to suit your preferences. Whether you’re preparing for a busy week or just looking for a wholesome snack, these no-bake granola bars are a fantastic choice. Plus, they don’t require turning on the oven, letting you whip them up even on warm days!
Why make this recipe?
Reasons to try it
What makes homemade no-bake granola bars a must-try is their versatility and health benefits. Packed with fiber from oats, natural sweetness from honey, and healthy fats from nut butter, they’re ideal for quick breakfasts, post-workout snacks, or a sweet pick-me-up during your day. They’re also budget-friendly, allowing you to save money compared to store-bought options. Plus, kids love them, making this a fantastic way to encourage healthy eating habits while enjoying a treat.
“These granola bars are my go-to for busy mornings! They are so easy to make and taste just right. I love experimenting with different mix-ins too!” — Happy Snacker
Preparing homemade no bake granola bars
The cooking process explained
Making these granola bars is as simple as mixing ingredients and letting the fridge do its magic. You’ll find that the entire process takes only a little time, and the result is something you can feel good about enjoying or sharing. Here’s what you need to do!
What you’ll need
To get started on these delightful homemade treats, gather the following ingredients:
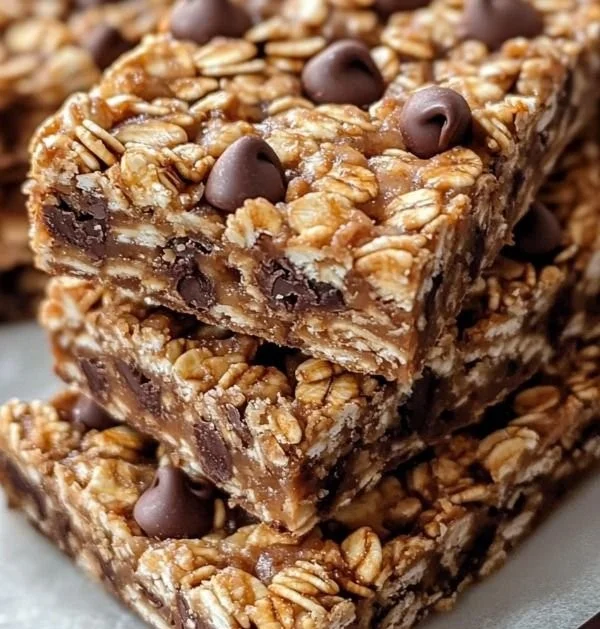
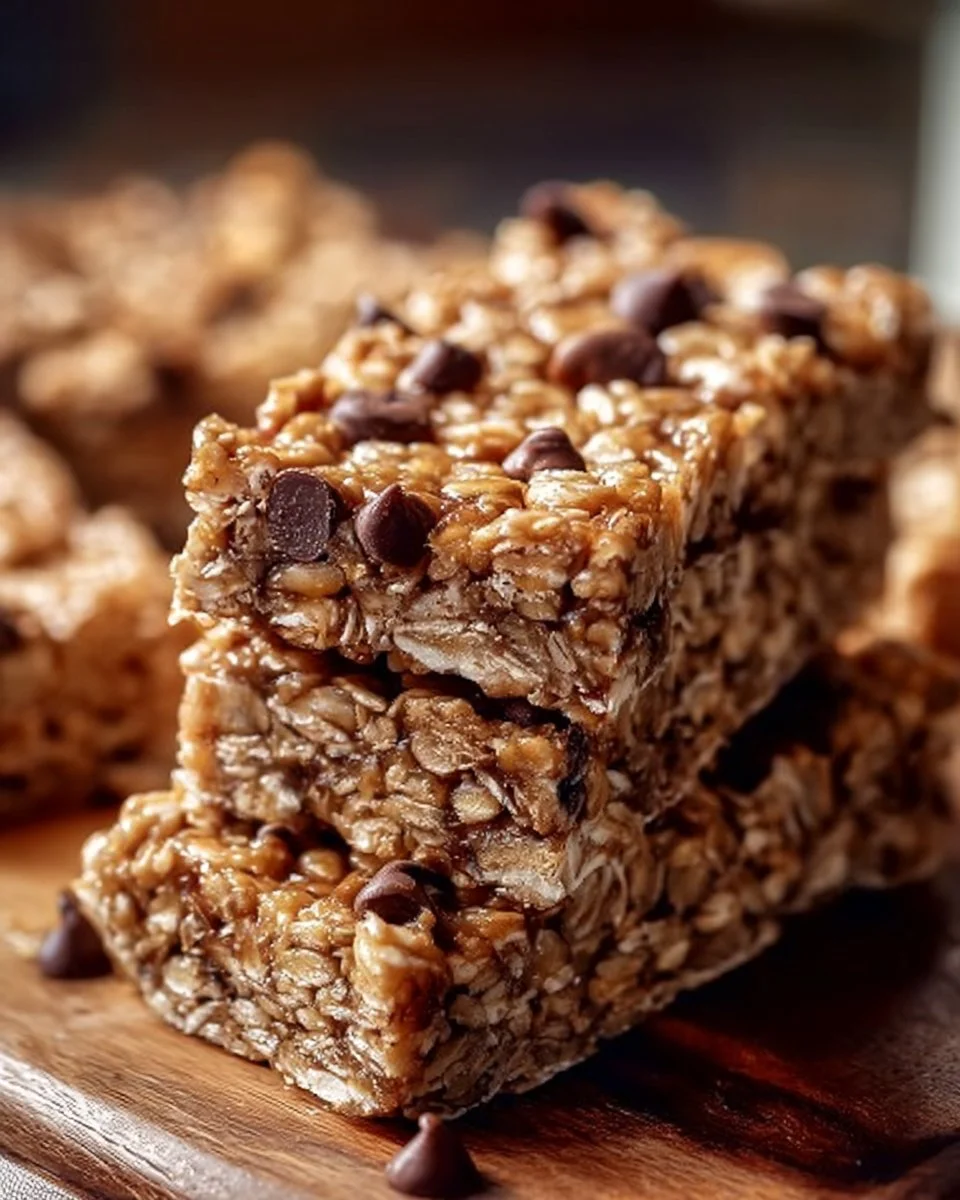
- 2 cups rolled oats (old-fashioned works best)
- 1/3 cup honey
- 1/2 cup nut butter (your favorite type)
- 1/2 cup mix-ins (like chopped nuts, dried fruits, or chocolate chips)
- A pinch of salt
- 1 teaspoon vanilla extract
These simple ingredients let you create a base for your granola bars that can be customized according to your tastes.
Directions to follow
Let’s dive into the steps to create your homemade granola bars:
- In a large bowl, combine the rolled oats, honey, nut butter, your chosen mix-ins, salt, and vanilla extract.
- Stir everything together until well combined. Make sure all the ingredients are evenly mixed for consistent flavor.
- Once mixed, press the mixture firmly into a lined baking dish. The more compact, the better!
- Place the dish in the refrigerator and chill for about 2 hours. This firming up step is crucial for sliceable bars.
- After chilling, cut into bars and enjoy your creation!
Best ways to enjoy it
Consider pairing these granola bars with fresh fruit or yogurt for a balanced breakfast. They’re also fantastic as a pre-workout snack, providing sustained energy without weighing you down. Wrap them individually in parchment paper for a quick grab-and-go solution, ensuring a nutritious option is always within reach.
How to store
Keeping leftovers fresh
To keep your granola bars fresh, store them in an airtight container in the fridge. This way, they can last up to a week. If you’d like to prepare ahead, you can also freeze them! Wrap the bars individually in plastic wrap, then place them in a freezer-safe bag. They should keep well for about three months. Just remember to allow them to thaw before eating!
Helpful cooking tips
Consider using a variety of nut butters to mix things up — almond butter or sunflower seed butter can bring a new flavor profile. When pressing the mixture into the pan, dampening your hands with a little water can prevent sticking. Also, if you prefer a little crunch, toast the oats lightly before mixing them!
Creative twists
Looking to add some flair to your granola bars? Try incorporating dried mango or coconut flakes into the mix for a tropical twist. If you’re in the mood for a dessert bar, sprinkle in mini chocolate chips or a drizzle of melted dark chocolate on top. The options are endless and allow you to personalize each batch!
Your questions answered
How long does it take to make no-bake granola bars?
The preparation time is approximately 10-15 minutes, but don’t forget the chilling time! Plan for about 2 hours in the fridge before cutting them.
Can I substitute the nut butter?
Absolutely! If you have nut allergies, sunflower seed butter is a great alternative, or you can try using tahini for a unique taste.
How do you know when the bars are ready?
After chilling, the bars should feel firm to the touch. If they feel too soft or crumbly, they may need more time in the fridge.
Can I make them vegan?
Yes, simply use a plant-based nut butter and maple syrup instead of honey for a vegan-friendly option.
With these homemade no-bake granola bars, the snacking possibilities are endless—healthy, delicious, and easy! Enjoy crafting your customized treats!
PrintHomemade No-Bake Granola Bars
Delicious and customizable granola bars perfect for healthy snacking, packed with fiber and flavor.
- Prep Time: 15 minutes
- Cook Time: 0 minutes
- Total Time: 135 minutes
- Yield: 12 bars
- Category: Snack
- Method: No-Bake
- Cuisine: American
- Diet: Vegetarian
Ingredients
- 2 cups rolled oats
- 1/3 cup honey
- 1/2 cup nut butter
- 1/2 cup mix-ins (chopped nuts, dried fruits, or chocolate chips)
- A pinch of salt
- 1 teaspoon vanilla extract
Instructions
- Combine the rolled oats, honey, nut butter, mix-ins, salt, and vanilla extract in a large bowl.
- Stir everything together until well combined.
- Press the mixture firmly into a lined baking dish.
- Place the dish in the refrigerator and chill for about 120 minutes.
- Cut into bars and enjoy your creation!
Notes
Store granola bars in an airtight container in the fridge for up to a week, or freeze individually wrapped for up to three months.